To Apply FireProofing to a Structure
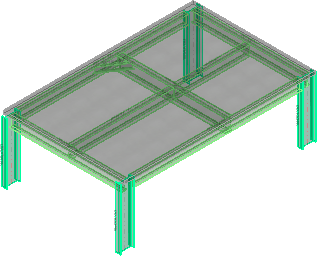
Fireproofing this small structure illustrates the modeling capabilities of the Apply Fireproofing tool.
-
Click
 .
.
You are prompted to select a member to apply the fire proofing to.
- Select a member with a datapoint. A second datapoint applies current fireproofing. To apply a desired fireproofing, first select the member(s) and then the Apply Fireproffing tool.
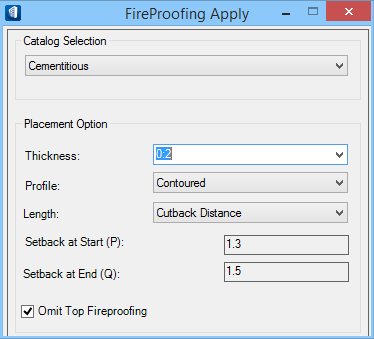
- In the FireProofing Apply dialog, select a fire proofing type from the Catalog Selection option drop list, enter a thickness, and select the Contoured Profile option.
- Select the Cutback Distance Length option.
-
Check Omit Top Fireproofing, and click in the view to apply fireproofing.
The selected member is encased in fire proofing material on all sides except the top where it supports the slab. The fireproofing ends where the member is cut back from the columns which are supporting it.
- Repeat steps 1-3 for the middle member.
-
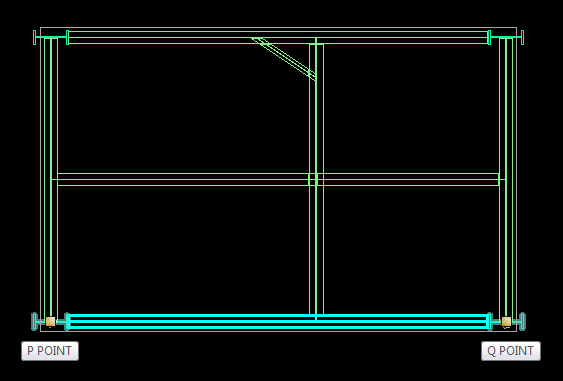
You want the fireproofing to avoid the small diagonal member. Select the By SetBack (Value) Length option.
The two Setback options (P and Q) are enabled.
-
Enter appropriate setback distance values for Setback at Start and Setback at End.
Tip: The start (P) point setback should be equivalent to the automated cutback distance while the end (Q) point is set back a larger distance due to the diagonal member. If you initially select the Cutback Distance Length option, you can see what the automated cutback distance is for this member. Enter this value for the end at the P point and a larger (measured) value for the end at the Q point.
- Check Omit Top Fireproofing, and click in the view to apply the fireproofing. The selected member is encased in fire proofing material on all sides except the top where it supports the slab. The fireproofing ends where the member is set back per your specifications.